Build A Cold Smoke Generator For Minimal Cash Outlay
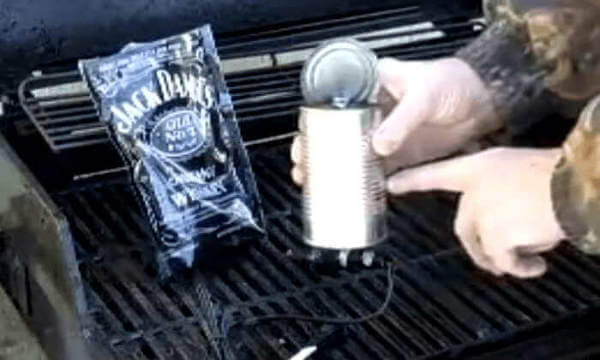
It's an easy project. You can build a cold smoker in a few minutes time and for the cost of just a few dollars. With just an empty can, a soldering iron and a bag of smoker pellets, you'll be able to create your own smoke generator.

How To Build An Inexpensive
Cold Smoke Generator
Only three items are needed.
- One new, small, inexpensive soldering iron
- One small bag of flavored smoker pellets
- One small tin can, with the lid still partially attached
Next time you open a can of corn or green beans, save that can. Open the can only about two-thirds of the way around. The lid will support the soldering iron.
Remove the label and any adhesive left on the outside of the can, and clean the inside thoroughly. With a small, sharp and sturdy knife, create a hole just large enough for the soldering iron near where the lid is attached to the can.
Purchase a new soldering iron for this project. DO NOT use one that has been used for soldering. There may be lead, a toxic heavy metal, present that could contaminate your food. A small soldering iron is all that's necessary. I purchased one at a large discount store for less than $5.00.
There are several types and flavors of smoker pellets available. Check out the grilling and barbecue section at your favorite store and you should be able to find some. I have used Jack Daniel's Brand smoker pellets with good results.
Using Your Smoke Generator
To use your new cold smoker, fill the can about one-third of the way with smoker pellets and bend the can lid closed. Insert the soldering iron, positioning it so when the can is laid on its side, the hot tip of the iron is under the pellets.
Lay it in your grill or smoker with your food that's to be smoked. Close the lid, being careful not to damage the electric cord. Plug in the soldering iron and you're good to go.
The generator will create cool smoke for up to an hour before needing to be recharged with pellets. Be aware that one filling of pellets may be enough, depending on what you're smoking. The pellets create quite a bit of smoke flavor.
To see the cold smoke generator in action, watch my short video, where I use one for smoking a block of cheddar cheese in my gas grill.
- You Are Here: Home >
- Tips >
- Build a Cold Smoke Generator
